Securing your home shouldn’t feel like reading a contractor’s manual. But for most beginners, installing home security cameras is exactly what makes it feel that way the moment they unbox their first system. Suddenly, there’s a pile of mounting hardware, cable runs, and app settings nobody warned them about.
Here’s the truth: installing home security cameras is far more manageable than it looks, even if you’ve never drilled a hole in your life. What most people get wrong isn’t the installation itself—it’s the planning. You need three things: the right sequence, a solid placement strategy, and a clear understanding of the mistakes beginners make.
This guide walks you through exactly how to install home security cameras the right way from the start. You’ll learn how to choose the right system before spending a dime, where to place each camera for real coverage, and the step-by-step process to install home security cameras without second-guessing your setup.
Quick Answer: How to Install Home Security Cameras
Most homeowners can install home security cameras in under a few hours. Wireless cameras typically take 15–30 minutes per unit, while wired systems may require 2–4 hours, depending on cable routing.
Steps to install home security cameras:
Plan camera locations — mount at 8–10 feet high, avoid direct sunlight, and stay within strong Wi-Fi range
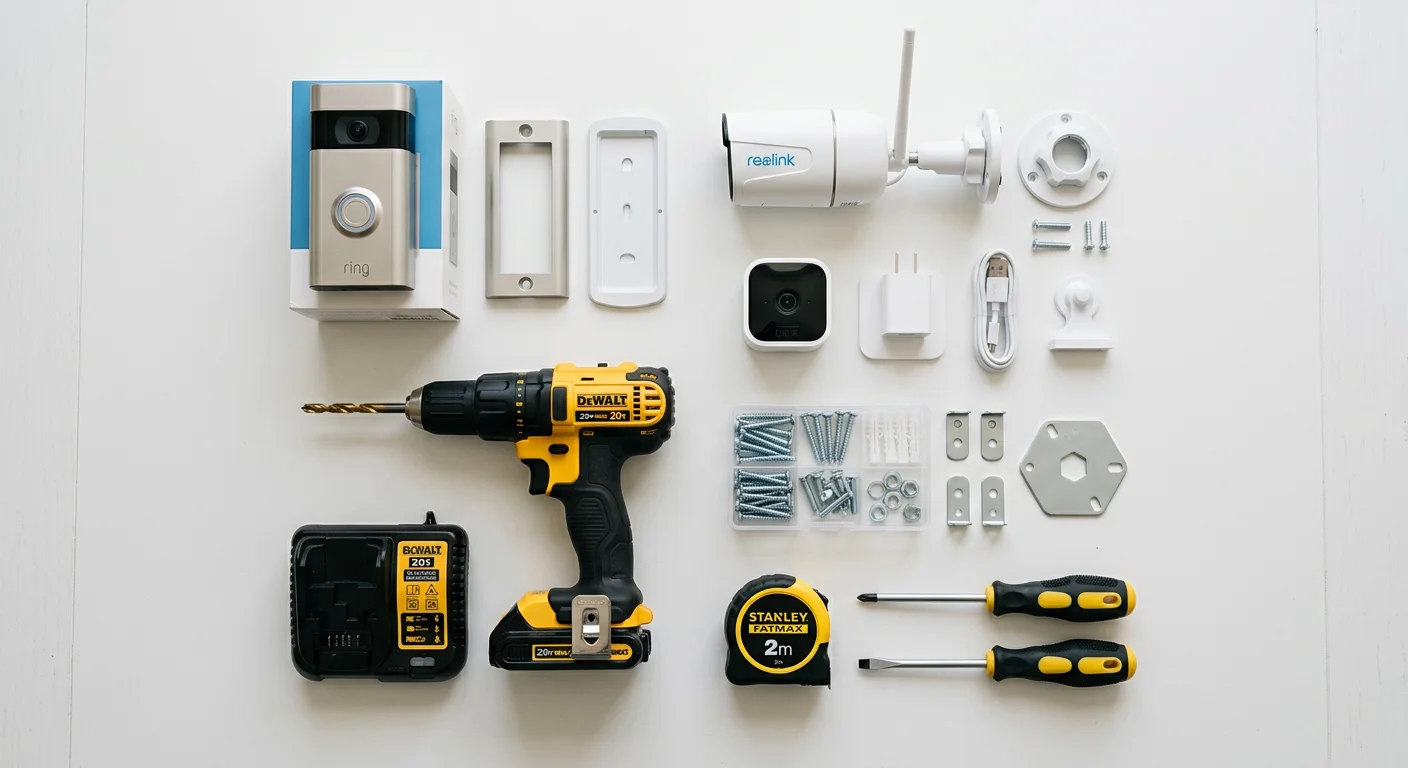
Gather tools and materials — drill, wire detector, mounting brackets, and weatherproof sealant
Mark and pre-drill holes — check for hidden wiring or pipes before drilling
Mount the bracket and camera — secure the base first, then attach the camera
Connect power and Wi-Fi — most systems use 2.4 GHz; ensure your phone is on the same network during setup
Configure settings in the app — adjust motion detection, resolution, and recording schedule
Test the system — check live view, recorded footage, alerts, and night vision performance
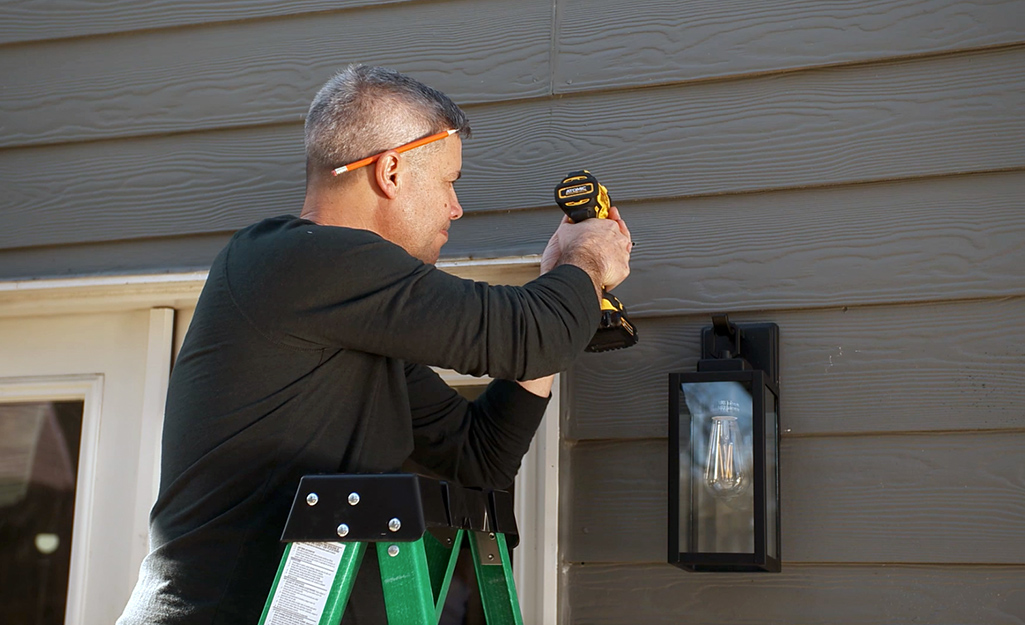
One thing most guides skip: connect your camera to Wi-Fi before you mount it. Troubleshooting connection issues from a ladder is far more frustrating than setting it up on the ground first.
Is It Hard to Install Home Security Cameras? (Beginner Reality Check)

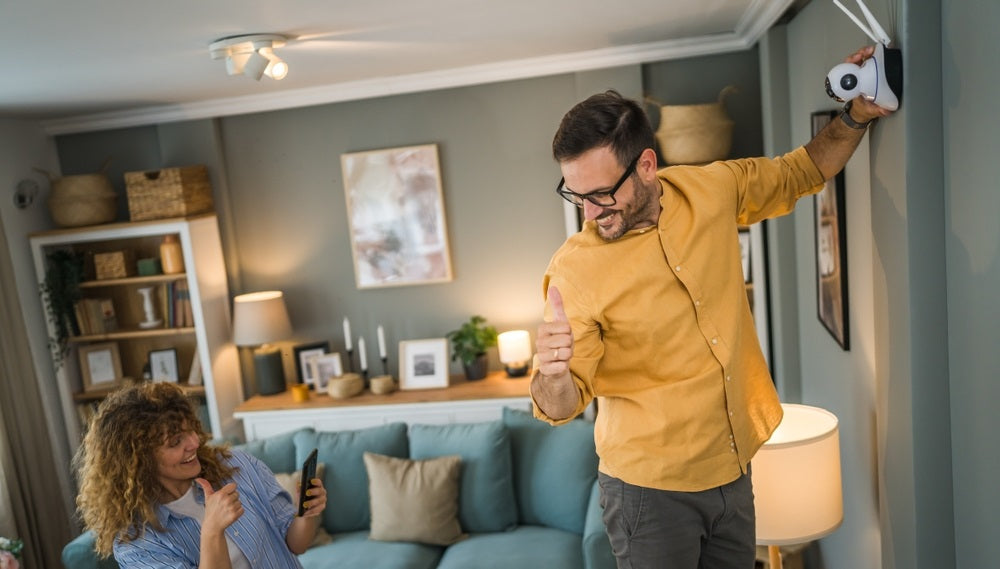
Most people assume it’s difficult to install home cameras —but in reality, the process is far simpler than expected. The physical work—drilling, mounting, and connecting devices—can usually be done with basic tools and a free afternoon.
Wireless systems are especially beginner-friendly. Download the app, scan a QR code, connect to Wi-Fi—done. Wired systems require more effort, mainly due to cable routing and setup, but they’re still manageable for a patient homeowner following the right steps.
The part that actually trips people up isn’t installation—it’s planning.
Before you install home security cameras, ask yourself:
Where are your blind spots?
Does your Wi-Fi reach that corner of the garage?
Which walls might hide electrical wiring or pipes?
Get these answers first. Once your layout is clear, the rest of the installation process becomes straightforward.
Where to Install Home Security Cameras for the Best Security Coverage
When you install home security cameras, placement matters more than the camera itself. A properly positioned $60 camera will always outperform a $300 unit placed in the wrong spot. Studies and real-world setups consistently show that smart positioning can improve usable footage quality by 2–3x, especially for identifying faces and license plates.
Before you install home cameras and start drilling, focus on strategy—not hardware.
Start With the Entry Points
Most break-ins happen through ground-level entry points. That’s why placement should always start here when you install home security cameras.
Cover these locations first:
Front and back doors — position cameras to capture clear, front-facing facial angles
Ground-floor windows — especially those not visible from the street
Garage and shed doors — common targets for tools, bikes, and vehicles
Side gates — often ignored, but frequently used entry paths
Driveway — angle for license plate visibility, not just motion detection
Go Higher Than Most Beginners Think
One of the most common mistakes when people install home security cameras is mounting them too low.
Ideal mounting height: 8–10 feet (2.4–3 meters).
Lower than that increases tampering risk. Higher than that reduces facial clarity.
Pair that height with a 15–30° downward tilt to capture faces and license plates without wasting frame space on sky or pavement.
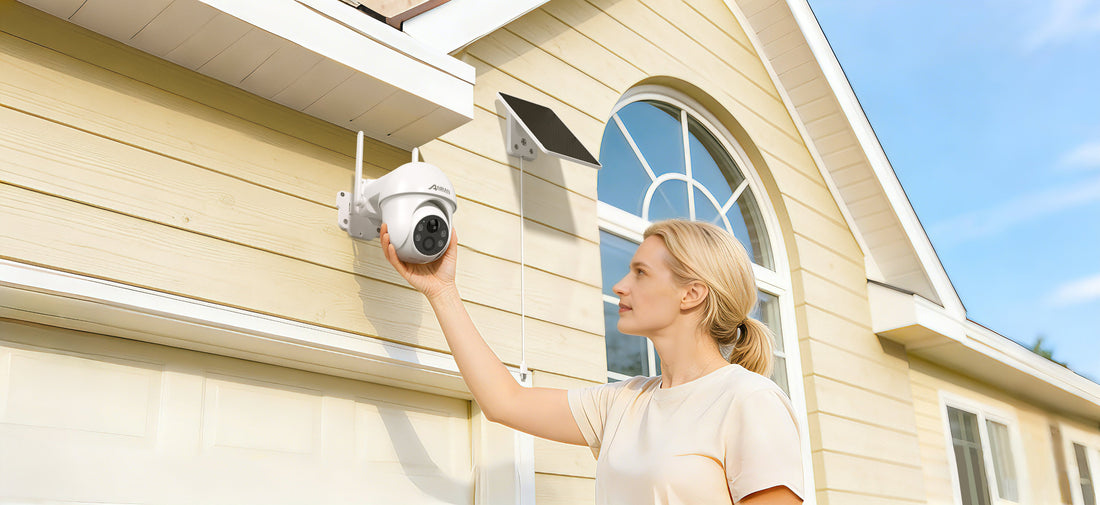
Whenever possible, mount under soffits or eaves instead of flat exterior walls. This provides natural protection from rain, sun exposure, and weather damage—helping extend the lifespan of your system.
Work Inward From the Perimeter
Once exterior coverage is set up, expand inward when you install home security cameras.
Focus on:
Main hallways and staircases — all movement flows through these areas
Second-floor hallways — especially if valuables are stored upstairs
Basement access points — especially those with exterior doors
One strict rule: avoid placing cameras in private spaces like bedrooms or bathrooms. Also, never point indoor cameras through glass—infrared motion detection does not function properly through windows.
How to Choose the Right System Before You Install Home Security Cameras
Choosing the wrong system before you install home security cameras doesn’t just waste money—it creates a false sense of security that fails when you actually need it.
Start with your home’s layout. Walk through every exterior door, ground-floor window, and weak point you’ve ignored. This step matters more than the brand you choose. A typical home requires 4–8 entry sensors, 2–4 motion sensors, and 2–6 cameras for full coverage. For most 2,000 sq ft homes, a 6-camera setup is a realistic baseline.
Choose Your Camera System Based on How You Live
Before you install home security cameras, your lifestyle determines the best system—not the specs.
Type | Installation Time | Best For |
|---|---|---|
Wired (PoE/DVR) | 2–4 hrs (often pro-assisted) | Permanent setups, large homes, high-security needs |
Wireless | 15–30 min per camera | Renters, beginners, flexible placement |
20–45 min | Outdoor areas without power access |
One important reality: many DIY wired installations fail due to routing and setup complexity, especially in older homes without easy cable access. If you choose this route, professional help is often worth considering upfront.
Storage, Subscription, and Brand Tradeoffs
Before you install home security cameras, storage decisions will affect your long-term cost more than the hardware itself.
Cloud storage: $3–$10/month for 7–30 days of video history
Local storage (microSD / NVR): $20–$100 one-time cost
Cloud systems are convenient, but ongoing fees add up over time. Local storage avoids subscriptions but risks data loss if hardware is stolen or damaged.
Beginner-Friendly Camera Brands
When you install home security cameras, brand choice affects setup speed, storage model, and long-term cost:
Ring — Fast setup (5–10 minutes), strong app ecosystem, subscription-based storage
Reolink
— No subscription required, strong local storage options, popular with DIY users
Blink — Budget-friendly, simple setup, long battery life (~2 years)
For beginners, the key decision isn’t just price—it’s whether you prefer subscription-based convenience or one-time ownership cost.
Tools and Preparation Needed to Install Home Security Cameras
Before you install home security cameras, preparation matters more than the actual installation. Most failed installs don’t happen during mounting—they happen when people start drilling without a plan.
Gather everything before you touch a wall. Stopping mid-install to search for a drill bit or missing screw can easily turn a 30-minute job into a multi-hour delay.
Core Tools You Need
The basic toolkit for installing home security cameras includes:
Cordless drill with appropriate bits — 12mm and 16mm bits typically cover wood, brick, and drywall installations
Ladder (8–10 ft reach minimum) — ensures safe mounting height without overreaching
Screwdrivers, pliers, flashlight — simple tools that are often overlooked but essential
Weatherproof sealant (caulk) — protects any exterior drilling points from water damage and corrosion
If You Are Installing Wired Cameras
If you plan to install home security cameras using a wired or PoE system, you’ll also need:
Fish tape (for pulling cables through walls)
CAT6a Ethernet cable (shielded recommended for outdoor runs)
BNC or RJ45 connectors (depending on system type)
PoE switch or injector (for power + data over one cable)
Pre-Installation Checklist (Do This Before Drilling)
Before you install home security cameras, always verify the following:
Check Wi-Fi signal strength at every planned camera location
Confirm power access or cable routing paths in advance
Use mounting templates to mark exact drilling points
Inspect walls for hidden pipes or electrical wiring
Drill pilot holes before inserting anchors
This step alone prevents most installation mistakes that beginners regret later.
Mounting Surface Safety (Often Ignored)
Battery-powered cameras may only weigh 8–16 ounces, but the mounting surface still matters.
Drywall alone is not enough for long-term stability. Always:
Secure into wall studs when possible
Or use properly rated wall anchors for load support
Avoid loose or hollow mounting points that may loosen over time
A secure mount is what keeps your home security camera installation stable long-term, especially outdoors.
How to Install Home Security Cameras (Step-by-Step Guide)
When you install home security cameras, the first decision comes immediately after opening the box: wired or wireless. Each option follows a different installation path, with different time requirements and potential pitfalls. Choosing the right one early makes the entire process significantly easier.
Wired Camera Installation (DVR / PoE Systems)
Wired systems take longer to install but offer greater stability. When you install home security cameras using a wired setup, the key is preparation—most failures happen during the planning stage, not the mounting stage.
1. Plan your layout first
Map every camera location before touching a wall. Trace cable routes from each camera back to the DVR or NVR. Avoid high-traffic areas where cables may be damaged or exposed.
2. Mark and drill carefully
Use mounting templates to mark drill points accurately. Before drilling, check for hidden pipes or electrical wiring. Only drill pilot holes after confirming the wall is safe.
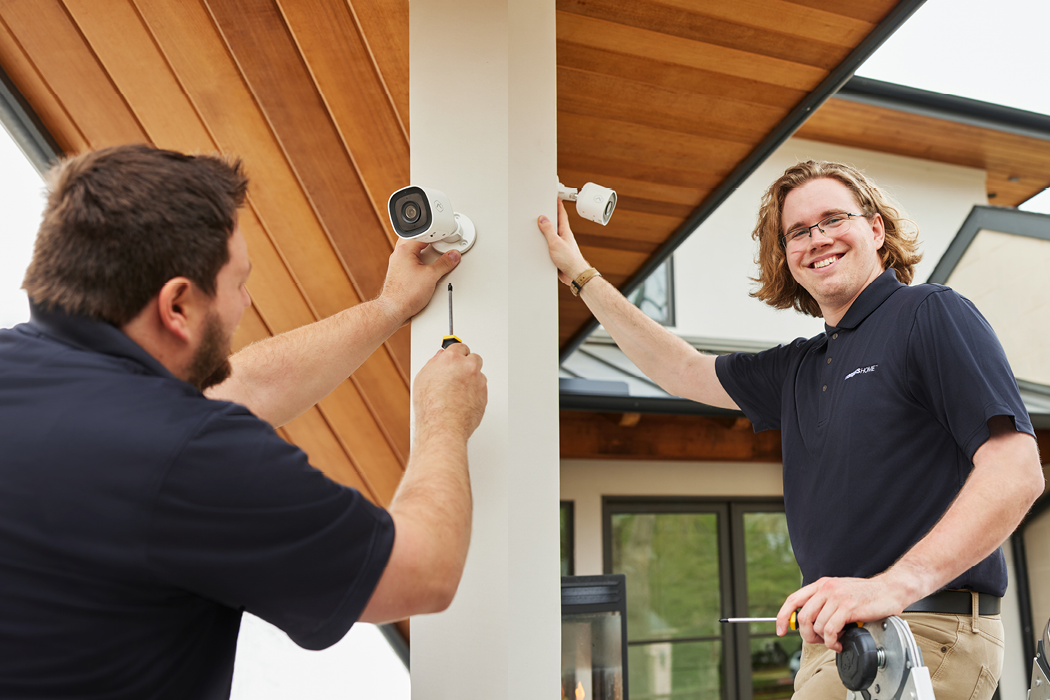
3. Install mounting brackets
Secure each bracket with 2–3 screws. At 8–10 feet in height, stability is critical. Drywall alone is not enough—use studs or properly rated anchors when installing home security cameras.
4. Run the cables
Route power and video cables back to the DVR system. PoE setups simplify this by combining power and data through a single CAT6a cable. For outdoor runs, use conduit to protect wiring from weather and tampering.
5. Mount and connect cameras
Attach each camera to the bracket, connect cables, and adjust the viewing angle. Focus on entry points and coverage zones rather than aesthetic framing.
6. Secure and organize cables
Use clips or conduit to keep cables tight and protected. Loose wiring increases the risk of damage, interference, and weather exposure.
7. Power on and test the system
Verify power output with a multimeter if needed, then test each camera feed in the DVR interface. Check image clarity, angle coverage, and signal stability.
Wireless Camera Installation (Wi-Fi, Battery, Solar)
Wireless systems are faster to install and ideal for beginners. However, when you install home security cameras wirelessly, skipping setup checks is the most common mistake.
1. Set up the app first
Download the camera app, create an account, and complete pairing via QR code before mounting. Test Wi-Fi signal strength at each planned installation point.
2. Perform a pre-mount test
Temporarily tape the camera at the intended height (8–10 feet). Check live video feed, angle, and motion coverage before drilling any holes.
3. Mark and drill mounting points
Use the provided template for accuracy. Pre-drill holes to secure mounting stability. Always verify screw size based on manufacturer specifications (solar models often differ).
4. Mount and secure the camera
Attach the bracket using 2–3 screws. Once stable, install the camera and adjust the viewing angle to cover entry points and key zones.
5. Sync to your network
Open the app and allow automatic detection. If your system includes a hub or sensors, pair them during this stage while setup is active.
6. Configure system settings
Adjust motion sensitivity, resolution, and alert preferences. Small changes here significantly impact what your system captures after you install home security cameras.
7. Final system test
Walk through each camera’s field of view and verify live feed performance. Ensure alerts, recording, and night vision all function correctly.
Important Note for Both Systems
Battery-powered cameras typically weigh 8–16 ounces, but the mounting surface must still be secure. When you install home security cameras, always prioritize structural stability over convenience.
Before finishing installation, test every camera feed inside the app. A properly mounted camera with no working feed is not a security system—it’s just hardware on a wall.
Common Mistakes to Avoid When You Install Home Security Cameras
Even a well-planned setup can fail during installation. When you install home security cameras, small placement or setup mistakes can significantly reduce performance. Below are the most common errors—and how to avoid them.
1. Mounting at the wrong height
One of the most common mistakes when you install home security cameras is incorrect mounting height.
Too high (above 10 ft / 3 m): captures the tops of heads, not faces
Too low: cameras become easy to tamper with or damage
Ideal range: 8–10 feet (2.4–3 meters) — high enough for security, low enough for identification clarity.
2. Relying only on Wi-Fi instead of wired connections
Wireless setups are convenient, but not always reliable for every situation.
Common issues include:
Dropped video feeds
Latency or delayed alerts
Weak signal in outdoor areas
When possible, use Ethernet ( PoE ) for stable performance. Always test Wi-Fi strength at the installation point before you install home security cameras permanently.
3. Ignoring lighting conditions
A camera without proper lighting is effectively limited in performance.
Problems include:
Poor night visibility
Blurry or unusable footage
False motion alerts
Choose cameras with strong IR night vision and consider adding external lighting for entry points. Always test night performance before final installation.
4. IR glare from walls or nearby objects
Infrared reflection is a hidden issue many beginners miss when they install home security cameras.
To avoid it:
Keep at least 3 feet (1 meter) distance from walls and fences
Avoid pointing directly at reflective surfaces
Prevent overlap between nearby cameras
Without this, night footage can become washed out or completely unusable.
5. Covering only the front door
Focusing only on the front entrance is a major security gap.
Break-ins often occur through:
Back doors
Side gates
Ground-floor windows
A proper system requires full perimeter coverage, not just a single entry point.
6. Pointing cameras outside your property
Legal issues are often overlooked during installation.
Avoid:
Recording neighbor driveways or private spaces
Angling cameras beyond your property boundary
Before you install home security cameras, check local privacy laws to ensure compliance.
7. Skipping the pre-mount test
One of the most preventable mistakes is drilling first and testing later.
Always:
Hold or tape the camera at the intended position
Check live view, angle, and coverage
Test both day and night conditions
Verify Wi-Fi signal strength before mounting
This simple step prevents most installation regrets.
What I Wish I Knew Before I Installed Home Security Cameras

IR glare can ruin night footage without warning
One of the most surprising issues when you install home security cameras is infrared (IR) reflection.
During setup, everything may look fine. But at night, reflected IR light can completely wash out the image, turning footage into a white haze.
What helps:
Keep cameras at least 3 feet (1 meter) away from walls, fences, or reflective surfaces
Avoid placing cameras too close to other camera housings
Always test night vision before final mounting
Network setup matters more than you think
Most beginners underestimate the importance of network configuration when installing home security cameras.
A weak or poorly secured network can lead to:
Video lag or dropped feeds
Reduced streaming quality
Security vulnerabilities
Best practice:
Use a strong, dedicated Wi-Fi network or a separate VLAN if available
Change default passwords immediately after setup
Enable modern encryption (such as AES-level security where supported)
Exterior cables are a weak point
Cable management is often ignored during installation, but it directly affects long-term durability.
Sunlight exposure (UV damage) can degrade exposed wiring over time, and loose cables are easier to tamper with.
To prevent issues:
Use conduit or protective tubing for all exterior runs
Route cables under eaves or along protected edges
Avoid leaving any exposed sections when you install home security cameras
Placement and setup mistakes are more expensive than hardware
The biggest lesson after you install home security cameras is that installation quality matters more than equipment cost.
A poorly placed camera will always underperform—even if it’s expensive.
A properly installed system significantly reduces risk
While results vary by location and setup quality, studies and real-world reports consistently show that visible security systems can reduce property crime risk by up to 50% or more when correctly installed and actively maintained.
The key condition: the system must be installed correctly and actively functioning—not just mounted.
DIY vs Professional: Should You Install Home Security Cameras Yourself?

When you install home security cameras, the decision between DIY and professional installation has less to do with skill level and more to do with your home’s layout and system complexity.
DIY Installation (Best for Most Homeowners)
For most beginners, DIY is the most practical option when installing home security cameras.
Roughly 80% of standard residential setups can be completed by homeowners with basic tools. Wireless systems are especially simple—most cameras can be installed in under 30 minutes per unit.
Typical process:
Mount the bracket
Connect the camera to Wi-Fi via the app
Adjust angle and test coverage
No scheduling, no technicians, and no disruption inside your home.
Cost advantage
DIY installation also significantly reduces long-term costs. In many cases, monthly monitoring expenses drop from around $40–$45/month to $20–$25/month, depending on the system and storage plan.
When You Should Hire a Professional
While DIY works for most cases, there are situations where professional installation is recommended when you install home security cameras:
Large homes with complex wiring routes or multiple floors
Multi-camera outdoor systems require precise coverage planning
Video doorbell + integrated smart home setups
Commercial or 24/7 monitored security systems
Fire, smoke, or alarm system integration
These setups often involve structured wiring, power routing, and system calibration that go beyond the typical DIY scope.
Why Wired Systems Are Different
Wired systems (PoE or DVR-based) require more technical precision when you install home security cameras.
Professionals typically handle:
Clean cable routing through walls or ceilings
Proper power distribution (PoE or dedicated circuits)
Signal stability optimization across multiple cameras
Long-term system reliability planning
While tutorials exist, real-world installations often involve unexpected structural challenges that are difficult for first-time installers.
Simple Decision Rule
The choice becomes straightforward when you apply this rule:
Wireless + small/medium home → DIY is enough
Wired + large-scale or complex layout → professional installation recommended
In most cases, installing home security cameras in a standard home is best done DIY, providing the best balance of cost, speed, and flexibility.
How Much Does It Cost to Install Home Security Cameras?
The cost to install home security cameras varies significantly depending on system type, camera resolution, and whether you choose DIY or professional installation. For most homeowners, the total cost is more spread out than expected—and understanding the breakdown is essential before making a purchase decision.
Average Cost Breakdown
A realistic total budget for equipment plus professional installation typically ranges from $591 to $2,040, with most homeowners averaging around $1,200–$1,300.
DIY installations significantly reduce total cost by eliminating labor fees, which often account for the largest portion of the expense.
Camera Cost by Resolution
When you install home security cameras, resolution directly impacts both image quality and total system cost.
Resolution | Camera Cost | Total Installed Cost |
|---|---|---|
1080p | $40–$100 | $90–$200 |
1440p (2K) | $80–$200 | $130–$350 |
4K (2160p) | $150–$300 | $200–$500 |
Higher resolution systems provide clearer identification footage but require more storage and a higher upfront investment.
System Cost by Size
Total installation cost also depends heavily on how many cameras you install.
2–4 cameras: $200–$1,000
4–8 cameras: $1,000–$3,500
8+ cameras: $2,000–$10,000+
Most standard homes fall within the 4–8 camera range when you install home security cameras for full perimeter coverage.
Labor Costs (Why Professional Installation Is Expensive)
Labor typically accounts for 50–70% of the total installation cost in professional setups.
This includes:
Cable routing and drilling
System configuration and testing
Network setup and optimization
This is the main reason DIY installations are significantly cheaper for homeowners who install home security cameras themselves.
Hidden & Ongoing Costs
Beyond hardware and installation, there are ongoing expenses many beginners overlook:
Cloud storage: $3–$25 per month (varies by retention period and features)
Subscription services: AI detection, alerts, and extended recording features
Local storage (microSD/NVR): one-time cost, typically $20–$150
Over time, subscription-based systems may exceed the initial hardware cost if you install home security cameras using cloud-only platforms.
Key Cost Insight
The most important factor isn’t the upfront price—it’s the long-term ownership cost.
When you install home security cameras, choosing between subscription-based systems and local storage can significantly affect total cost over 2–3 years.
FAQs About Installing Home Security Cameras
These are the most common questions people ask when they install home security cameras, answered clearly and without unnecessary complexity.
Can I install home security cameras myself?
Yes. Most wireless and battery-powered systems are designed for DIY installation. When you install home security cameras, the simplest method is to temporarily position the camera, check the live view through the app, and then secure the mount.
Battery-powered cameras typically last 3–6 months per charge , depending on usage, motion activity, and environmental conditions.
Do I need an electrician to install home security cameras?
Not for wireless or battery systems. However, professional help is recommended for wired or PoE systems that require structured cabling.
PoE (Power over Ethernet) systems transmit both power and data through a single CAT6 cable, which simplifies installation but may still require drilling, routing, or compliance with local electrical codes when you install home security cameras permanently.
Where should I never install security cameras?
Avoid installing cameras in private indoor spaces such as bedrooms and bathrooms.
You should also avoid:
Directly behind glass windows (reduces motion detection accuracy and causes IR reflection)
Areas with strong reflective surfaces that interfere with night vision
When you install home security cameras, placement should always prioritize privacy compliance and image clarity.
How many security cameras do I need?
Most standard homes require 4–8 cameras for full coverage when you install home security cameras.
General guideline:
1–2 cameras per entry point
Wide-angle coverage for corners
At least 1 camera covering staircases or main hallways
Always map your home layout first—blind spots are easier to identify on paper than after installation.
Quick facts about installing home security cameras
Ideal mounting height: 8–10 feet (2.4–3 meters)
Audio recording laws (U.S.): vary by state (some require one-party or all-party consent)
Video surveillance laws: generally allow recording in public-facing areas like driveways and front yards
Signage requirements: some states require visible notice of surveillance (varies by jurisdiction)
Before you install home security cameras, always check your local privacy and recording regulations to ensure compliance.
Final Thoughts: The Best Way to Install Home Security Cameras
By now, you have everything you need to confidently install home security cameras—not just understand the process, but actually complete it.
Home security cameras aren’t just for tech enthusiasts or homeowners with large security budgets. With the right placement strategy and a little preparation, most beginners can successfully install home security cameras in just an afternoon.
The key takeaway is simple:
What matters most
When you install home security cameras, focus on these two priorities:
Choose the right system for your home before purchasing anything
Cover all entry points first — front door, back door, garage, and ground-floor windows
Everything beyond that is optimization, not essentials.
Your next step
Before you install home security cameras, take a few minutes to walk through your home and identify three key areas where coverage would matter most. Mark them down and start there.
You don’t need a perfect plan to begin—you just need a starting point.
Final reminder
A properly installed system is not just about adding hardware to your home. When you install home security cameras the right way, you’re improving visibility, control, and peace of mind measurably.
And in most cases, that improvement takes less than a single afternoon.