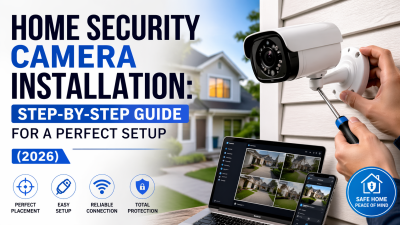
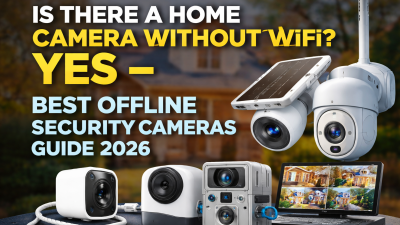
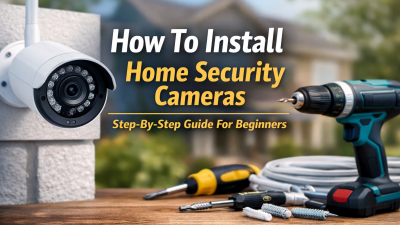
Most people buying a security camera spend hours comparing specs — but struggle when it comes to home security camera installation, where real protection actually depends on execution, not features.
They mount cameras too high and lose facial detail. They miss key entry points like front corners and side doors. Or they discover too late that WiFi drops exactly where coverage matters most.
The result is expensive hardware that creates a false sense of security instead of reliable home protection.
This guide fixes that. Whether you’re setting up a rental apartment, a large family house, or a system that has failed before, you’ll learn a clear, step-by-step approach to home security camera installation — from choosing the right system to placing cameras correctly and testing coverage like a real intruder would.
Before You Start Home Security Camera Installation: Follow This Decision Path
Before You Start Home Security Camera Installation: Follow This Decision Path
Most security camera installation projects fail at the planning stage. In fact, around 70% of security camera failures come from poor placement and weak network signal — not from the cameras themselves.
Before you buy a single cable or mount a single device, go through this decision process carefully. It will determine whether your system actually works or becomes an expensive decoration.
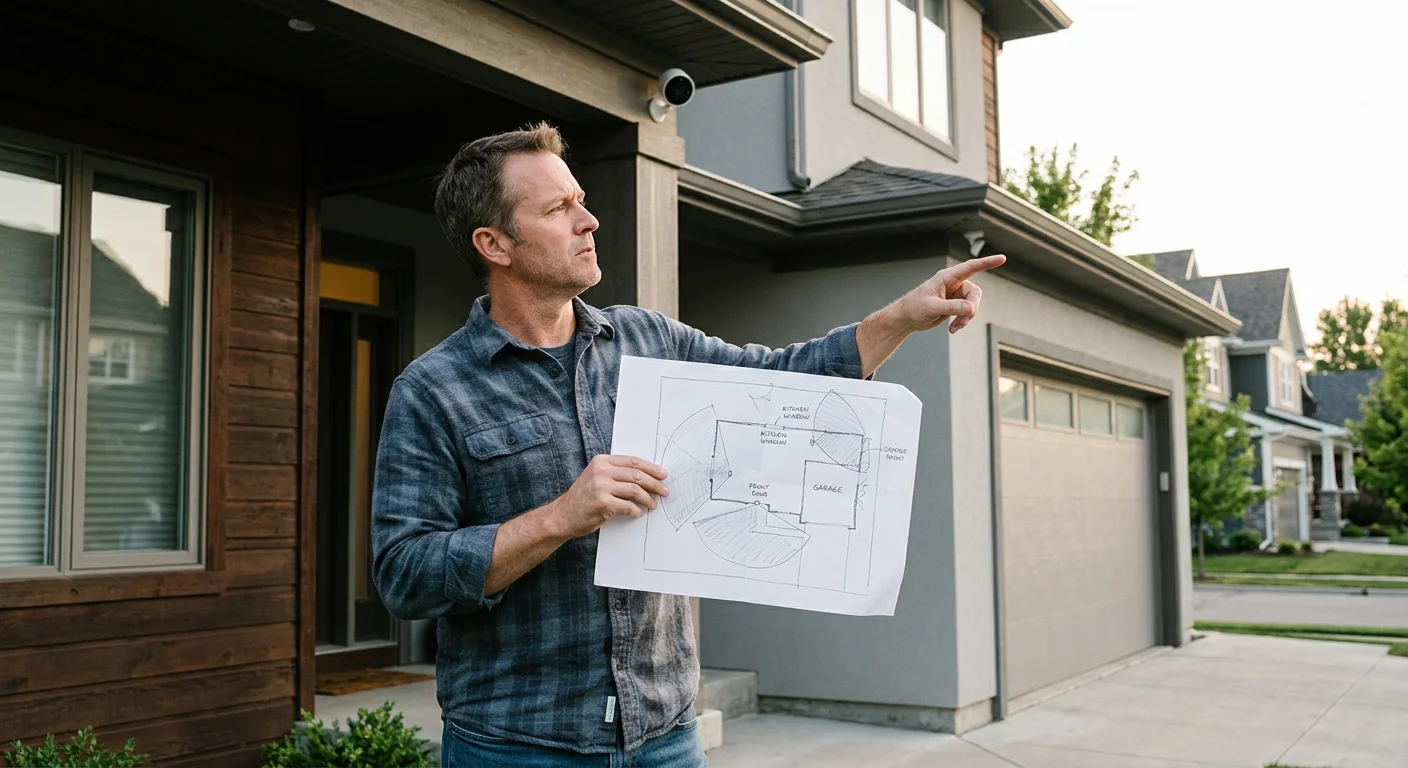
1. Map your coverage zones first
Start by identifying your key security points:
Entry doors (front, back, side)
Ground-floor windows
Driveways and garages
Main indoor hallways and staircases
Sketch your layout before installation. Look for obstacles like walls, furniture, or outdoor structures that could block the camera’s field of view. Good planning is the foundation of effective home camera installation.
2. Estimate camera count by home type
Your home layout determines system size:
Apartments: 2–4 cameras (entry + main indoor areas)
Houses: 6–8+ cameras (full perimeter + interior coverage)
Underestimating coverage is one of the most common installation mistakes.
3. Test your WiFi before installation
Each camera typically requires 2–5 Mbps upload speed for stable HD streaming.
Check signal strength at every planned camera location — not just near the router. Weak coverage zones should be identified before installation begins, not after system failure.
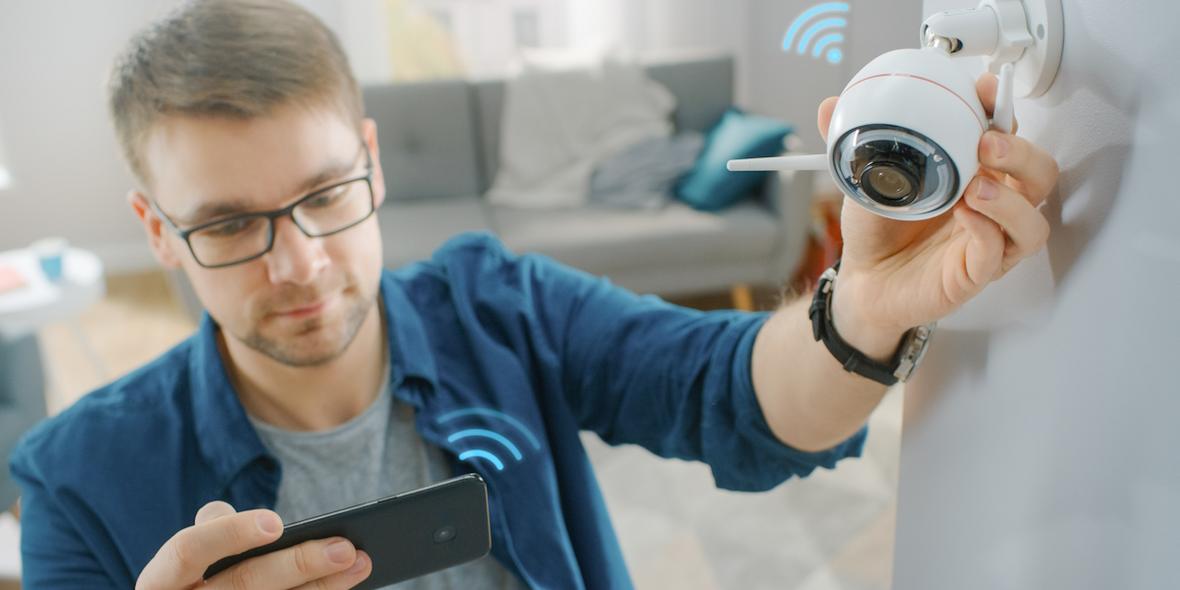
4. Decide: DIY or professional installation
DIY installation: saves roughly $100 per camera in labor
Professional installation: typically $800–$2,000 per full system
DIY works well for small, simple setups. Professional home security camera installation is usually worth it for large homes, multi-story properties, or permanent systems where reliability matters most.
5. Choose your storage method
You have two main options:
Local storage (1–2TB HDD):
Stores ~30 days of 1080p footage
Full data control
No monthly fees
Cloud storage:
$5–$15 per camera/month
Remote access and backups
Ongoing cost + privacy considerations
6. Check local rules before installation
One step most guides skip: always review HOA rules and local regulations before outdoor mounting.
Some areas are restricted:
Camera angles facing neighboring property
Recording shared spaces
Checking this early prevents forced repositioning or legal issues after installation.
Types of Home Security Camera Installation (Wireless vs Wired vs PoE Explained)
The type of system you choose for home security camera installation doesn’t just affect video quality — it directly determines how complex the installation process will be, and how reliable your system will be long-term.
There are three main types of setups on the market. Each one balances convenience, cost, and reliability differently.
Wireless (WiFi) Camera Installation
Wireless cameras are the simplest option for home security camera installation. They run on battery, solar power, or a standard outlet, and typically take just 5–15 minutes per camera to set up.
Basic process:
Mount the camera
Connect it to the mobile app
Adjust the viewing angle
However, convenience comes with tradeoffs. In real-world conditions, WiFi cameras can experience a 10–20% dropout rate in congested environments. Signal interference from thick walls, neighboring networks, and household devices (like microwaves) can reduce stability and cause missed recordings.
Wired & PoE Camera Installation
Wired systems — especially PoE (Power over Ethernet) setups — are designed for reliability rather than speed of installation.
PoE uses a single Cat5e or Cat6 Ethernet cable (up to 100 meters) to deliver both power and data. This eliminates the need for separate power outlets at each camera location.
Typical installation time: 30–60+ minutes per camera
Installation steps usually include:
Drilling cable routes through walls or ceilings
Running Ethernet cables to a central switch or NVR
Crimping and terminating RJ45 connectors
When properly installed, PoE systems deliver up to 99.9% uptime with stable 4K video streaming and minimal interference — making them one of the most reliable options for permanent home security camera installation.
Wireless vs PoE Installation Comparison
Feature | Wireless (WiFi) | Wired (PoE) |
|---|---|---|
Setup Time | 5–15 min | 30–60+ min |
Reliability | 10–20% dropout risk | ~99.9% uptime |
Video Quality | HD/4K, may lag on a weak signal | Stable 4K, no lag |
Power | Battery or outlet | Single Ethernet cable |
Maintenance | Higher (battery + signal issues) | Low |
Cost Per Camera | $50–$200 + install | $100–$300 + cabling |
Which Home Security Camera Installation Type Should You Choose?
Here’s the practical breakdown:
Wireless systems → Best for renters, small homes, or temporary setups where flexibility matters more than long-term stability.
PoE wired systems → Best for permanent home security camera installation, where reliability, uptime, and clean performance are the priority.
Wireless wins on convenience and speed. PoE wins on everything else — especially stability and long-term maintenance.
While PoE systems require higher upfront effort and cost, they often pay off over time through fewer signal issues, less troubleshooting, and more dependable security coverage over the long run.
Home Security Camera Installation Difficulty Comparison (Time, Tools & Skill Level)

Not every home security camera installation is the same — and choosing the wrong setup for your skill level can easily turn a simple weekend project into a full-day frustration.
Understanding the difficulty level of each system helps you choose the right approach before you start drilling, wiring, or mounting anything.
Wireless Camera Installation (Beginner Level)
Time: Under 1 hour per camera
Skill level: Beginner
Best for: 1–3 cameras, apartments, or single-story homes
Basic tools required:
Drill
Ladder
Screwdriver
Wireless home security camera installation is the most beginner-friendly option. Most setups involve mounting the camera, connecting it to a mobile app, and adjusting the angle. No wiring or network configuration is required beyond WiFi setup.
Best suited for users who want fast deployment with minimal technical work.
Wired Camera Installation (Intermediate Level)
Time: 2–4 hours total (depending on layout complexity)
Skill level: Intermediate
Best for: Small systems (1–4 cameras)
Tools required:
Spade bit drill
Fish tape
Measuring tools
DVR/NVR setup equipment
Wired home security camera installation requires routing cables through walls or ceilings back to a central DVR system. It involves more planning, drilling, and cable management compared to wireless systems.
This setup is ideal for users comfortable with basic construction work, but it becomes inefficient once you exceed 4–5 cameras without professional help.
PoE Camera Installation (Advanced Level)
Time: 4–8+ hours (multi-camera systems)
Skill level: Advanced
Best for: Full-home or perimeter coverage
Tools required:
Ethernet cables (Cat5e/Cat6)
Fish tape
Drill + wall bits
Cable management tools
PoE switch or NVR system
PoE-based home security camera installation is the most technically demanding but also the most reliable option. Each camera connects via a single Ethernet cable that delivers both power and data.
Cables typically run back to a central NVR, requiring careful planning and structured cable routing.
If you’re not experienced with networking or low-voltage wiring, hiring a contractor is usually the more efficient option.
Installation Difficulty Summary
Skill Level | Recommended Setup |
|---|---|
Beginner | Wireless (1–3 cameras) |
Intermediate | Wired (under 5 cameras) |
Advanced | PoE (full coverage systems) |
Any level (recommended for complex setups) | Professional installation |
Professional Installation Insight
A professional home security camera installation typically takes less than half a day for a full system.
Labor cost: $100–$200 per camera
Faster setup with fewer errors
Optimized placement and cable management
While the upfront cost is higher, professional installation often pays off in large or complex systems where mistakes (like poor wiring or blind spots) are expensive to fix later.
Common Home Security Camera Installation Mistakes

Good hardware fails for one simple reason: poor home security camera installation decisions made in the final setup stage. These mistakes directly impact coverage, image clarity, and system reliability.
Here are the most common errors that reduce real-world security performance:
Mounting height mistakes in home security camera installation
The ideal mounting height is 8–10 feet with a slight downward angle.
Above 10 feet: you lose facial and license plate detail
Below 7 feet: cameras become easy tampering targets
Correct height is critical for effective identification, not just coverage.
Poor lighting and angle placement during home security camera installation
Avoid pointing cameras directly at:
Sunlight
Streetlights
Bright windows
These conditions cause overexposed or washed-out footage, making recordings unusable when you actually need them.
Infrared reflection issues in home security camera installation setups
Placing cameras too close to reflective surfaces (within 2–3 feet) or facing walls can cause IR bounce.
This leads to white glare or foggy night vision, especially in low-light conditions.
WiFi instability and signal neglect in home security camera installation
Weak or untested WiFi is one of the leading causes of system failure:
Missed motion alerts
Video buffering or lag
Sudden disconnections
Always test signal strength at each planned camera location before installation, not just near the router.
Wrong placement zones during home security camera installation planning
Most break-ins occur through:
Front doors
Back doors
First-floor windows
Cameras placed in low-risk areas like side yards or decorative zones often miss critical entry points entirely.
Skipping pre-installation testing in home security camera installation
Every camera should be tested indoors before mounting:
App connection and pairing
Live video stability
Night vision and motion detection
Hardware functionality
Skipping this step often results in failed setups that require full remounting.
Best Places for Home Security Camera Installation

Proper home security camera installation placement matters more than camera quality. Even the most advanced system will fail if it does not cover the right entry points or is positioned with blind spots.
Most security failures are not caused by equipment — they come from poor camera positioning and coverage gaps.
Start with a simple rule:
80% of break-ins occur through front doors, back doors, and first-floor windows.
That is where your home security camera installation should focus first.
Primary zones for home security camera installation coverage
These are the essential areas every system must cover:
Front door (priority #1)
Install at 8–10 feet with a downward angle to capture clear facial details.
Video doorbells work well for package and visitor monitoring.
Back and side doors
These are common entry points. Ensure full doorway + approach coverage with motion detection enabled. Partial angles create blind spots.
Driveway and garage area
Essential for vehicle and license plate visibility. Cover the full approach path, not just the garage door.
First-floor windows
Often overlooked in home security camera installation planning, but they are high-risk entry points.
Secondary zones for expanded home security camera installation coverage
Once entry points are covered, expand surveillance to:
Backyard corners, side yards, and fence gates for perimeter movement detection
Wide outdoor areas for early intrusion detection and reduced false alerts (animal vs human filtering)
These zones are not primary targets but help improve early warning capability.
Key principles for home security camera installation positioning
To eliminate blind spots, every installation should follow these core rules:
1. Mounting height (8–10 feet optimal)
High enough to prevent tampering
Low enough to capture facial features (eyes, nose, mouth)
2. Field of view selection (110°–180° recommended)
140°+ wide-angle lenses reduce camera count
Extreme wide angles may introduce edge distortion
3. Cross-coverage strategy (critical for full protection)
Place cameras so each unit covers another’s blind zone.
A 20–30% overlap between cameras ensures no coverage gaps.
This is one of the most effective techniques in professional home security camera installation design.
Indoor home security camera installation placement strategy
For interior coverage, efficiency matters more than quantity:
Hallways and main staircases provide the highest coverage efficiency
Corner mounting at ~45° angles can achieve near 180° room visibility
Avoid bedrooms and bathrooms for privacy compliance
Focus on shared living spaces and movement pathways
Step-by-Step Home Security Camera Installation Guide (Correct Order Matters)
A proper home security camera installation process is not about speed — it is about sequence. Skipping steps often leads to re-drilling walls, misaligned cameras, or broken cable runs that fail during setup.
Follow this structured installation guide to ensure a reliable and professional-grade system.
1. Plan your home security camera installation layout first
Before touching any tools, map your entire system:
Identify all camera locations
Plan cable routes back to your DVR or NVR
Choose the shortest and most protected paths through walls or ceilings
A proper home security camera installation layout plan reduces installation errors and prevents unnecessary drilling.
2. Prepare tools and materials for home security camera installation
Gather everything before starting:
Drill and bits
Ladder
Screwdrivers and pliers
Electrical tape and sealant
Fish tape for cable routing
Camera mounting templates
Missing tools mid-installation is one of the most common causes of delays in home security camera installation projects.
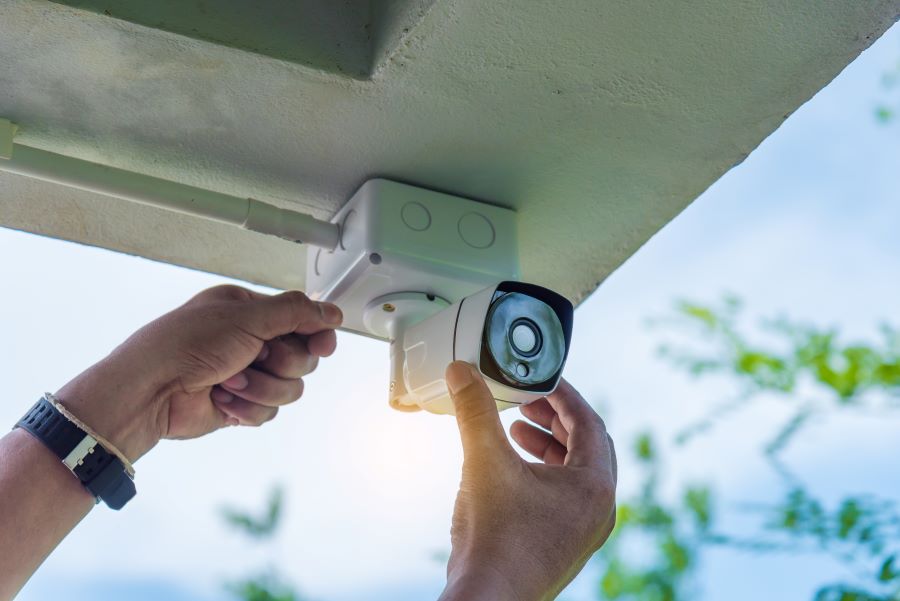
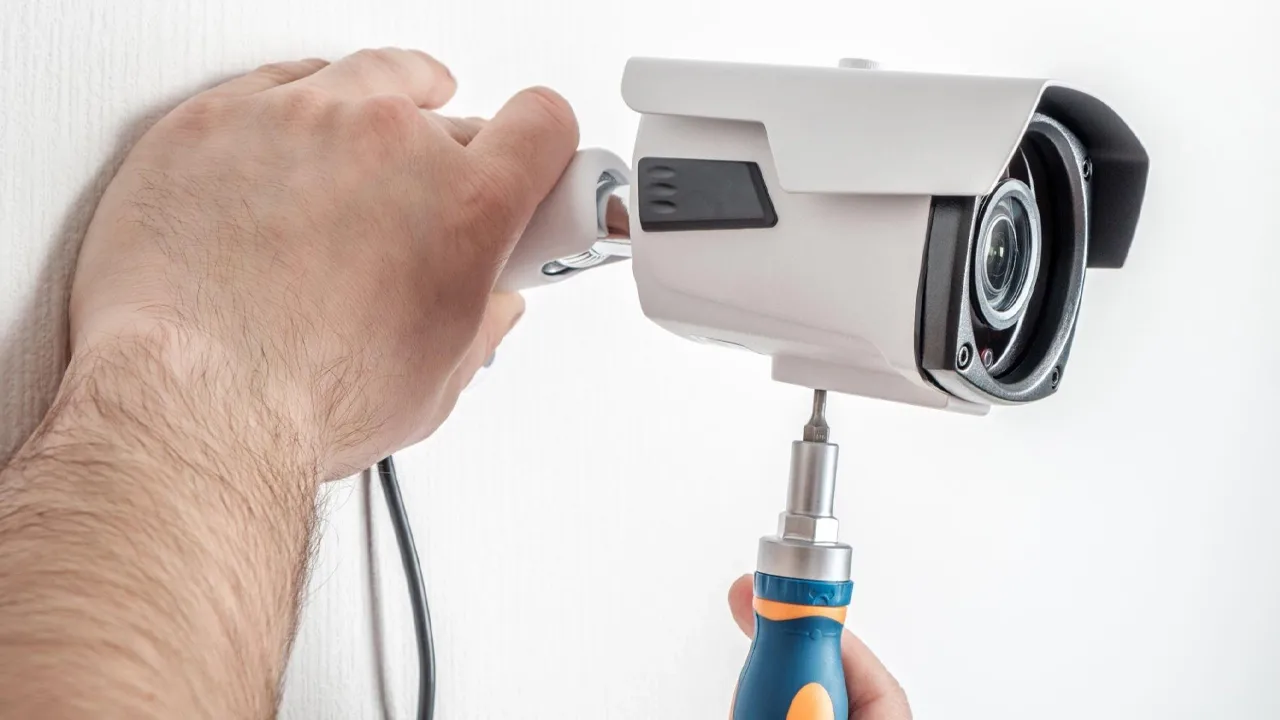
3. Mount brackets correctly (foundation of home security camera installation)
Secure mounting is critical for long-term stability:
Use masonry anchors for brick surfaces
Toggle bolts for drywall
Wood screws for framing
Always install at 8–10 feet height, which is the standard for effective home camera installation coverage and tamper resistance.
4. Run cabling properly (wired home security camera installation only)
For wired or PoE systems:
Turn off the power before starting
Drill pilot holes using templates
Route cables through conduit or protective raceways
Use fish tape for hidden wall routing
Exposed wiring increases the risk of damage, tampering, and system failure.
5. Install cameras and complete physical connections
Once cabling is in place:
Secure each camera to its bracket
Connect power and data cables
Organize and clip cables to avoid sagging or exposure
Clean cable management improves both reliability and long-term maintenance.
6. Connect system to DVR or network (home security camera installation setup phase)
Verify all connections are fully seated
Assign IP addresses for network systems
Update firmware immediately to avoid security vulnerabilities
Outdated firmware is one of the most overlooked risks in home security camera installation setups.
7. Configure software and optimize settings
Set up your system through the app or NVR interface:
Adjust resolution and recording mode
Set motion detection sensitivity
Define recording schedules
After configuration, fine-tune each camera’s field of view before locking positions.
8. Test your home security camera installation like a real intrusion scenario
Final validation is essential:
Walk all entry points (front door, back door, driveway)
Check live view and recorded playback
Look for blind spots, lag, or missed triggers
A properly executed home security camera installation should capture every key movement without delay or coverage gaps.
Real Home Security Camera Installation Examples (Apartment vs House Setups)
Understanding real-world scenarios is key to effective home security camera installation planning. Different living environments require completely different installation strategies, especially when it comes to coverage, wiring, and camera placement.
Below are two of the most common security camera installation setups: apartments and single-family houses.
Apartment Home Security Camera Installation Setup (Renter-Friendly, No-Drill)
Apartment installations focus on flexibility, portability, and non-invasive mounting.
Typical setup includes:
Install one camera at the front door, angled toward hallway traffic for entry monitoring
Add a compact WiFi or 4G camera near parking areas for vehicle protection alerts
Use a pan-and-tilt indoor camera placed on shelves to cover the main living spaces
Avoid mounting near windows or strong light sources to prevent glare issues
Use adhesive or magnetic mounts to comply with rental restrictions
In many cases, a single well-placed front-door camera significantly improves security awareness, especially for entry monitoring in apartment home camera installation setups.
House Home Security Camera Installation Setup (Layered Perimeter Coverage)
House installations prioritize full perimeter visibility and multi-layer protection.
A standard home security camera installation for houses typically includes:
Start from outer perimeter: gate → driveway → side yards → rear access → entry doors
Front door cameras should be mounted at around 9 feet for optimal balance between visibility and tamper resistance
Use multiple cameras (typically 6 or more) to ensure full property coverage
Combine wide-angle outdoor cameras with focused entry-point cameras for layered security
This approach ensures continuous surveillance from approach zones to entry points.
Apartment vs House Home Security Camera Installation Comparison
To simplify decision-making, here is a direct comparison of home security camera installation setups:
Aspect | Apartment Setup | House Setup |
|---|---|---|
Camera Count | 1–3 cameras | 6+ cameras |
Installation Type | Wireless, adhesive, portable | Wired + wireless hybrid possible |
Coverage Focus | Entry door, corridor, parking | Full perimeter + entry points |
Placement Strategy | Minimal, high-impact zones | Layered coverage system |
Flexibility | High (renter-friendly) | Moderate (permanent install) |
Key Insight for Both Home Security Camera Installation Scenarios
Regardless of property type, the core principle remains the same:
Always prioritize entry points first
Identify blind spots before mounting
Test all camera angles before final installation
A properly planned home security camera installation is less about the number of cameras and more about whether every critical access point is fully covered.
Home Security Camera Installation Cost Breakdown (DIY vs Professional Pricing Guide)
Understanding the home security camera installation cost is essential before choosing a system. The total price depends not only on equipment, but also on labor, system size, and long-term maintenance.
Costs vary significantly between DIY setups and professional installation services.
DIY home camera installation cost breakdown
DIY installation focuses on equipment only, making it the lowest upfront-cost option.
Typical pricing ranges:
2–4 cameras: $200–$1,000 total
4–8 cameras: $1,000–$3,500 total
Ongoing costs: $10–$30/month (cloud storage or self-monitoring services)
DIY systems are cost-effective but require personal effort for setup, wiring, and troubleshooting. This makes them ideal for smaller home security camera installation projects or flexible setups.
Professional home security camera installation cost breakdown
Professional installation includes labor, configuration, and system optimization.
Typical pricing:
Installation fee: $99–$199 for basic residential setups
4–8 camera systems: $2,000–$4,500 total installed
National average: around $1,300+ depending on complexity
Professional systems are typically used for full-property home security camera installation projects, especially where wiring or coverage planning is complex.
Home security camera installation cost comparison table
Setup Size | DIY Installation | Professional Installation |
|---|---|---|
2–4 cameras | $200–$1,000 | $600–$1,500 |
4–8 cameras | $1,000–$3,500 | $2,000–$4,500 |
8+ cameras | $1,500+ | $3,000–$10,000 |
Hidden costs in home security camera installation
Beyond upfront pricing, several long-term costs are often overlooked:
DIY hidden costs: tools, mounting hardware, WiFi upgrades, troubleshooting time
Professional hidden costs: scheduling delays, limited flexibility for future relocation
Both options: cloud storage fees ($3–$10 per camera/month)
These hidden factors significantly impact the true home security camera installation cost over time.
Which home security camera installation option is better?
The right choice depends on system size and complexity:
DIY installation: Best for small systems, renters, and budget-focused setups
Professional installation: Best for large properties, wired systems, or long-term permanent setups
In most cases, DIY reduces upfront home security camera installation cost, while professional installation reduces long-term maintenance and setup errors.
Home Security Camera Installation by Brand (Setup Experience Differences)
The brand you choose directly affects your home camera installation experience, long before you actually mount anything. From setup time to wiring complexity and app configuration, each system has a very different learning curve.
The ring is designed for fast, beginner-friendly installation. The app walks you through every step, and most cameras can be mounted and activated in under 15 minutes. This makes it ideal for quick DIY home security camera installation. The tradeoff is ecosystem lock-in — you stay within Amazon’s platform, and local storage options are limited.
Arlo offers a more flexible but slightly more complex setup. Installation is still straightforward, but configuring the SmartHub and optimizing network settings takes more time. In return, you get stronger range performance and flexible storage options, including both cloud and local recording.
Eufy focuses on privacy and local control. Its standout feature is built-in local storage, which removes monthly subscription requirements. Installation is still DIY-friendly, but the app experience is less polished compared to Ring or Arlo, especially during initial setup.
Google Nest works best for users already inside the Google Home ecosystem. Installation is smooth if your smart home is already integrated, but outside that environment, setup and long-term management can feel less intuitive.
In general, your brand choice should match your installation goals: speed and simplicity, flexibility, or privacy-first control. This decision directly impacts how smooth your entire home security camera installation process will be.
Test Your Home Security Camera Installation Like a Real Intruder
Once your hardware is mounted and your app is connected, the final step in any security camera installation is testing the system under real-world conditions. This is where most setups fail — not because of the equipment, but because no one verifies coverage properly.
Move through your property as if you were evaluating potential weak points. Approach each entry point from different angles and speeds, including normal walking pace and low-angle movement that simulates someone trying to stay out of view. The goal is to confirm that every camera reacts consistently across realistic scenarios.
Key things to test after installation:
Motion detection response
Motion alerts should reach your phone within 3–5 seconds
Anything beyond 10 seconds indicates configuration or network delay issues
Night vision clarity
At around 15 feet in low-light conditions, a person or object should be clearly identifiable
Blurry or washed-out footage usually indicates IR reflection or poor placement
Blind spot coverage
No part of the critical area should be blocked more than ~10% of the frame
If coverage gaps appear, adjust the angle or reposition the camera
Recording and playback
Trigger motion and confirm the video is saved correctly
Footage should be accessible on your phone within 10 seconds
A commonly missed test is entry-path detection timing. Walk from the street toward your main entrance and check when the alert triggers. Ideally, your system should detect movement before someone reaches the front door area. If detection only occurs too late, your motion zones are likely too narrow and should be expanded to cover a wider entry buffer area.
Any issues found during this stage should be corrected immediately. In a properly configured home security camera installation, small adjustments at this stage prevent major security gaps later.
Post-Installation Checklist for Home Security Camera Installation Success
Completing a home security camera installation does not end when the cameras are mounted. A proper post-installation check ensures your system is fully functional, properly configured, and reliable in real-world conditions.
Use the following checklist to verify your setup before considering the installation complete.
Coverage & Image Quality
Walk the entire property and review each camera’s field of view
Check for blind spots during both daytime and nighttime (IR mode)
Confirm image clarity is sufficient to identify faces and license plates
Connectivity & Remote Access
Verify that all cameras are online and properly connected to the network
Ensure IP addresses are correctly assigned, and firewall settings allow access
Test mobile app functionality, including live view, motion alerts, and playback
Motion Detection & Recording
Adjust motion sensitivity to minimize false alerts while maintaining detection accuracy
Confirm that real movement consistently triggers recording
Verify that footage is properly saved to the cloud or local storage and accessible for playback
Mounting, Wiring & System Documentation
Inspect all mounts to ensure brackets are secure and stable
Confirm cables are properly managed, labeled, and protected from damage
Record camera locations, IP addresses, and wiring paths for future maintenance or upgrades
A frequently overlooked part of home security camera installation is documentation. Without it, troubleshooting or system expansion becomes significantly more difficult later.
A few minutes spent validating the system now can prevent hours of diagnostics and potential security blind spots in the future.
FAQ: Home Security Camera Installation Questions Answered
This section covers the most common questions about home security camera installation, including setup time, wiring, tools, and best practices for beginners and advanced users.
Can I install a security camera myself?
Yes — a single basic camera can usually be installed as a DIY project using simple tools such as a drill, screws, and basic sealing materials. It is recommended to test the system indoors before mounting it at height.
For systems with three or more cameras, professional installation is often recommended. Larger setups involve wiring, network configuration, and coverage planning, where mistakes can lead to security blind spots and higher long-term correction costs.
How long does home security camera installation take?
DIY installation typically takes under one hour per camera, depending on mounting difficulty and wiring requirements.
Professional installers can usually complete a full multi-camera system within half a day for standard residential setups.
What type of cable is used for security cameras?
The required cable depends on the system type:
Analog cameras: Use Siamese cable (RG59 coaxial + 18-gauge power wire)
IP cameras: Use Cat5e or Cat6 Ethernet cable
For outdoor or permanent installations, all cables should be run through protective conduit to prevent damage, weather exposure, or tampering.
What happens if my camera system loses power?
A UPS (Uninterruptible Power Supply) is recommended to maintain short-term operation during outages and to protect equipment from voltage spikes.
This ensures continuous recording and prevents data loss during unexpected power interruptions.
What is the ideal mounting height for security cameras?
The recommended height for most home camera installations is 8–10 feet.
This range provides:
Sufficient height to reduce tampering risk
Proper downward angle for facial identification
Balanced field of view for entry points and driveways
Mounting too high reduces identification detail, while mounting too low increases vulnerability to interference or damage.
Final Thoughts on Home Security Camera Installation
By this stage, you understand the key principles of home security camera installation — the difference between wireless and PoE systems, how placement affects coverage, and what real-world blind spots look like.
But knowledge alone is not enough. The difference between a system that simply exists and one that actually protects your home comes down to execution.
A proper home security camera installation is not defined by expensive equipment or the number of cameras installed. It is defined by placement strategy, stable connectivity, and a system that is properly configured and tested.
Before considering the setup complete, go back to your post-installation checklist. Walk through your property from an outside perspective. Identify weak points, test alerts, and confirm that every camera performs under real conditions.
This final step — verifying and refining your system — is what turns a basic installation into a reliable security setup.
In the end, your system is not finished when the last camera is mounted. It is finished when your home security camera installation performs exactly as expected, even when you are not there to monitor it.